When you’re a novice in the fly fishing world, it can be confusing trying to get your head around you fly tying needs. When you’re looking to purchase fly tying accessories, you should think about whether you need a whole kit or just the relevant tools, as this will influence the decision you make.
Ultimately, when it comes to tying flies, you should be thinking about the type of fly fisher you are, the fish you catch, and the places you fish. This enables you to understand the kind of flies that will work best for you and how to tie them. That way, you can make a choice between the best flying tying kits without getting in such a fuss.
Luckily, we’ve produced this handy guide to give you a tour around the current world of fly tying kits today. We’ve put together a pros and cons list of some of the best setups we could find, and we’ve given you a thorough walk-through on how to make a choice.
At a Glance: Our Top Picks for Fly Tying Kits
- OUR TOP PICK: Dr Slick Fly Tying Tools Gift Set with Fly Box Combo
- BEST BUDGET OPTION: WETFLY Deluxe Fly Tying Kit with Book and Dvd
- Colorado Anglers Z797 Standard Tool Kit
Comparison of the Best Fly Tying Kits
| IMAGE | PRODUCT | |
|---|---|---|
Our Top Pick  |
| View Latest Price → |
Best Budget Option  |
| View Latest Price → |
 |
| View Latest Price → |
 |
| View Latest Price → |
Why Buy a Fly Tying Kit?
Before we even start, it is important to think about why we would tie our own flies. While, yes, you can purchase some pretty nifty fly fishing flies from fishing stores and online, you may find that you run into some advantages of making your own.
Firstly, tying your own flies saves you money. While flies are not particularly expensive, they come in at around $3. Over time, the out of pocket costs can really accumulate.

Fly Box (Source)
When you purchase a fly tying kit, your material costs come to around $0.20 . This means you’re overpaying by $2.80 every time you buy a store-made fly.
Secondly, you’ll find that the cheap flies in the store are made from low-quality materials. Not only do they easily break and get lost, they also pollute the water that you’re putting them in at a faster rate. Tying your own flies prevents them from getting lost quite so often as you can use quality materials for a lower price.
Lastly, tying your own flies allows you to have a range of colors and patterns that are unique to you. While this may not be important for everyone, those in fishing competitions and fishing for sport may find that the colors give you better branding and allow you to recognize your lines more easily.
What Goes Into a Great Fly Tying Kit?
Firstly, before we talk about any specific tool, the most important thing to go in your fly tying kit is quality. While cheaper kits may appear to be bargains, you’ll find the tools to be of shoddy quality and materials to break easily. This will lead to you having to replace your flies much faster. In this sense, look for high-quality kits with durable tools and high ratings.

Fishing Tackle (Source)
When it comes to tools, however, there are a few basic tools that are a must in your fly tying kit. No matter how many tools a kit is boasting, these are the most integral ones.
Vice
Hooks get very small and delicate and even experts end up with a few slipping into the wrong places. A vice will help you to hold everything in place, especially when it's wet. A good quality vice will be able to adjust to accommodate a range of hook sizes.
You may find some with levers and some with spring-loaded mechanisms. Interchangeable in quality, either mechanism is fine depending on preference. The vice should be durable and strong, and you should consider a C-clamp over a pedestal as it is more easily portable.
Scissors
You no doubt have a dozen pairs of scissors in your fishing tackle box already, however, a pair just for fly tying is super helpful as they don’t get all sticky from fish juice.
The scissors in your kit should be very sharp and should have super-fine points to allow for extremely close cutting. Some kits come with a range of scissors for various fly tying methods.
Bobbin Holder and Bobbin Wire Loop Tool
The fly tying process is a little fiddly, so a bobbin holder can help to prevent you from getting tangled. The bobbin holder gives you better tension during the tying process, while the bobbin wire loop tool makes the threading process much faster. The bobbin holder also serves to protect the bobbin which can be made from ceramic, brass, or plastic.

Fishing Tackle Box (Source)
Dubbing Twister
A dubbing twister is designed to create tension in the tying process. The tension prevents the feathers and fur from falling out of place. This allows you to twist the dubbing and to create a rope. By doing this, you create dubbing loops to make your flies.
Bodkin
Sometimes referred to as a dubbin needle, a bodkin is an essential tool due to its versatility. It is used to prepare the underfur by combing it, while it can also be used for applying the head cement and working with the dubbing materials. The bodkin is also often used for freeing fibers that have become trapped.
Hackle Pliers
The pliers work like the vice in that they allow grip to prevent the pieces from slipping away. The pliers are used to hold the hackle tightly. They are also used in the process of wrapping that hackle around the hook, creating a firm attachment, while protecting your fingers.
Added Extras
You may find that your kits include a few other accessories. Hair stackers are great tools as they allow you to line all your fibers up in a nice row before tying them. This allows you to arrange your fly more effectively, without getting in a muddle.
You may also find that your kit comes with a threader. For those with poor eyesight, the threader helps to thread the needle for the dubbing process.
Review of the Best Fly Tying Kits
If you’re interested in giving fly tying a go, you’re probably looking to purchase a fly tying kit. This is a handy guide to our top five fly tying kits. We’ve given you a breakdown of the pros and cons of each kit, and provided a summary to explain who each kit best suits and what it should be used for.
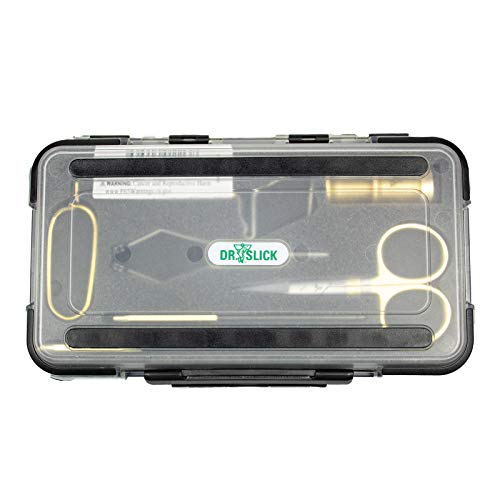
Best Overall:
Dr. Slick Fly Tying Tools Gift Set with Fly Box Combo
PROS
CONS
Review
This beautiful, compact gift set is a great choice for making your own flies. The kit comes in a smart carry case which protects all the tools. The instruments have been put through a six-step quality assurance testing process to ensure that each kit is of the highest durability.
The materials and threads must be purchased separately and there is no room for them in the fly box. However, the kit is very compact and fits neatly in a tackle box.
Bottom Line
This lightweight kit is a great addition for any fisher looking to make their own flies. The kit includes all the basic tools needed, along with a secure carry case to protect the tools. While they’re designed for lightweight use, they are surprisingly versatile in what they can create.
Product Specs
Dimensions:
10 x 1 x 15"
Weight:
0.65 lbs
Box Material:
Plastic and Foam lining
Includes:
4″ all purpose scissors, 4″ ceramic bobbin, 5″ bodkin, 5.5″ bobbin threader, 2″ medium hair stacker, 4″ whip finisher, 2.25″ non-rotary hackle plier (Bamboo set includes Deluxe Rotary Hackle Pliers)
Best for the Money:
WETFLY Deluxe Fly Tying Kit with Book and DVD

PROS
CONS
Review
The deluxe set is jam-packed with fly tying goodies. Featuring an instructional DVD and guidebook to teach you how to tie your own flies, this set comes with all the basic tools needed to get started.
The versatile kit is a great gift idea and comes complete with all the dubbing, hackle, and chenille materials needed to get going instantly.
Bottom Line
This is a great starter kit with a range of accessories and materials to get you going. The instructional video and book are a great way to learn how to tie your own flies, but you will need to purchase a separate whip finisher and head cement. It is important to note that while this is relatively low in cost, you’ll be surprised by the high quality of the materials in the kit.
Product Specs
Weight:
1.65 lbs
Includes:
Hooks Size 8,12, and 14, Copper and Black Thread, Book and DVD, Chenille and Yarn, Super AA Vise with a C-clamp, Scissors, Hackle pliers, Hair stacker, Bobbin, Bobbin threader
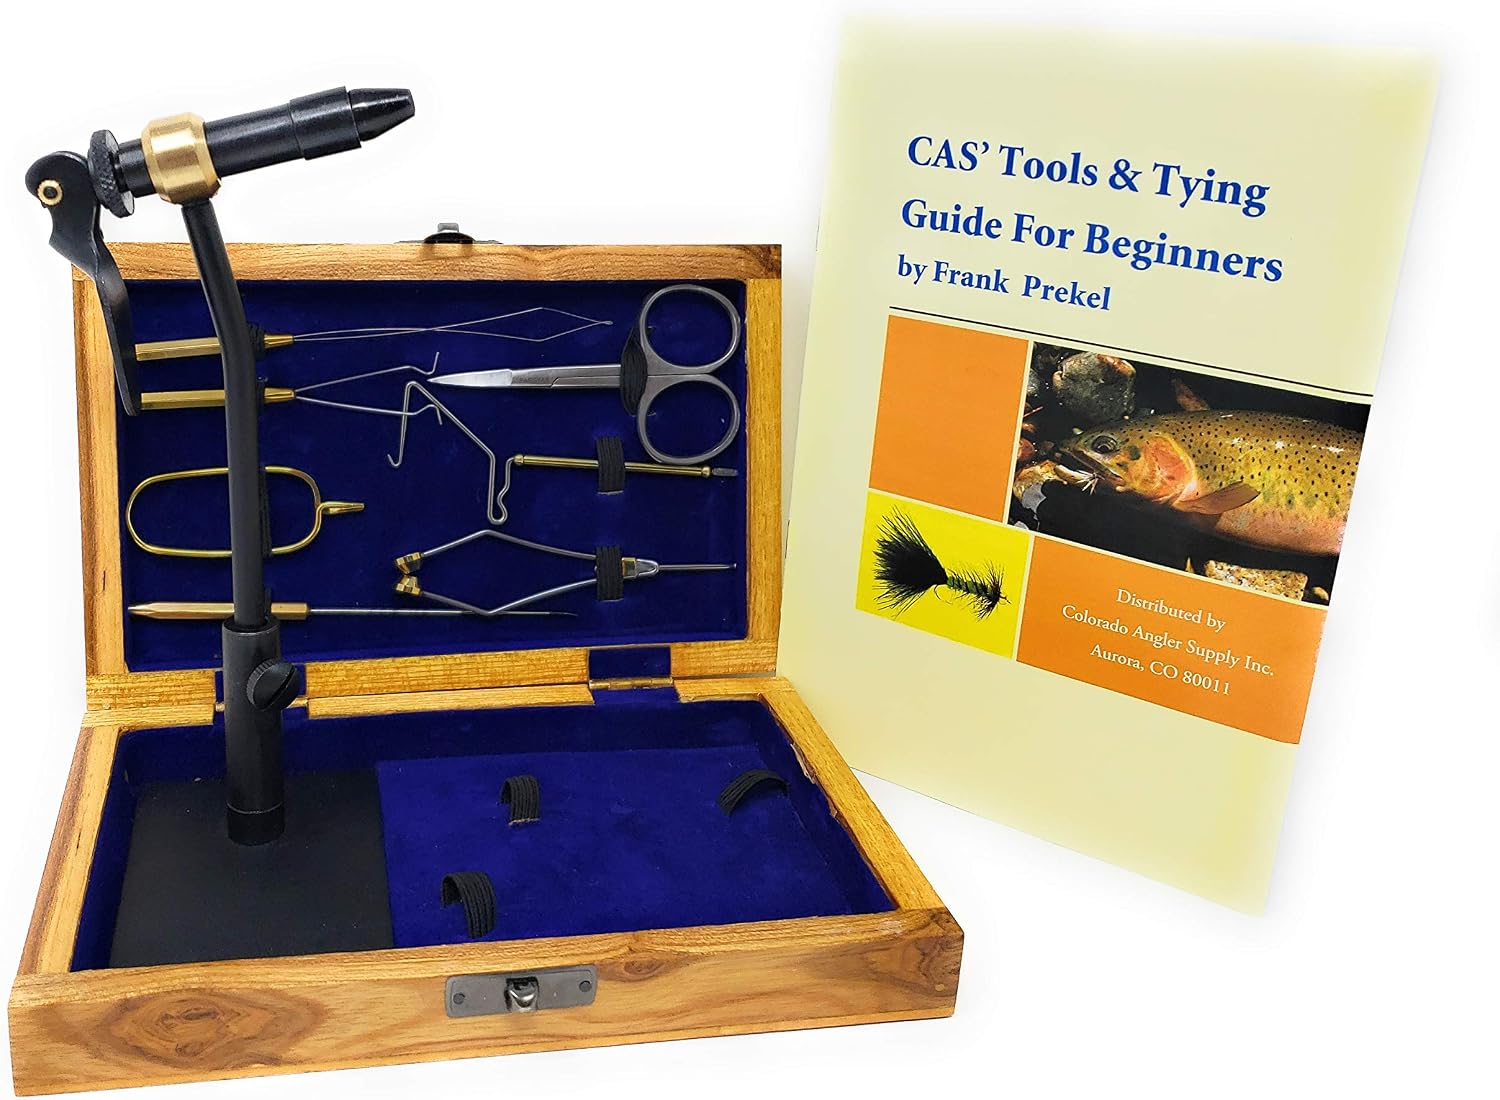
3. Colorado Anglers Z797 Standard Tool Kit
PROS
CONS
Review
This beautiful, traditional looking set comes in a velvet-lined wooden box. It includes seven tools encompassing all the basic needs of a fly tyer.
The vice comes with its own base for a more stable grip, while the tools are made from high-grade stainless steel to prevent against corrosion and provide reliable results.
Bottom Line
Overall, this is a great kit for beginners and pros alike. A compact kit, this can be stored away easily and can be used anywhere thanks to the vice’s base. However, it is important to note that it shouldn’t be shaken around too much and nothing heavy should be placed on the box.
Despite this, it contains all the basic tools needed to make flies and lasts a long time due to its durability and high-grade components.
Product Specs
Dimensions:
9 x 5.8 x 1.8"
Box Material:
Wooden
Includes:
Vise with base, Bobbin, Threader, Bodkin, Dubbing Twister, Hackle Pliers, Scissors, Whip Finisher
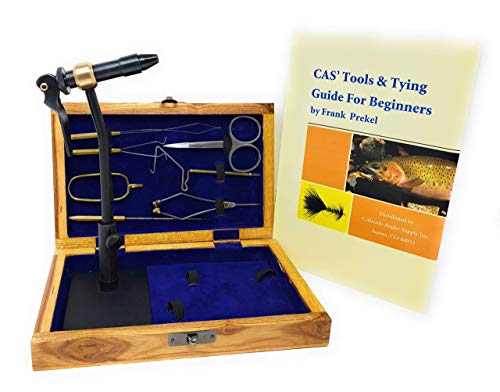
4. Creative Angler Wooden Fly Tying Station with Tools and Materials

PROS
CONS
Review
This beautifully organized workstation is the ideal place to make fishing flies. This set encompasses all the tools needed to make a myriad of fishing flies, while also housing them in a super efficient manner to keep everything tidy.
Featuring an instructional booklet, as well as twelve different tools and all the materials you need, this set really is the complete comprehensive station for fly making.
Bottom Line
A beautiful organizer, this desktop station is ideal for keen fly tyers. The kit packs away to neatly protect all tools, while the kit includes all the materials you need to get started.
Aimed at advanced fly makers, beginners may need to purchase additional learning materials. While a little expensive, this kit is well worth the money with twelve tools to work with and a beautiful aesthetic finish.
Product Specs
Dimensions:
11-1/2 x 8-1/2 x 3"
Box Material:
Wooden
Includes:
Hooks Size 8,12, and 14 Copper and Black Thread, Book and DVD, Chenille and Yarn, Super AA Vise with a C-clamp, Scissors, Hackle pliers, Hair stacker, Bobbin, Bobbin threader
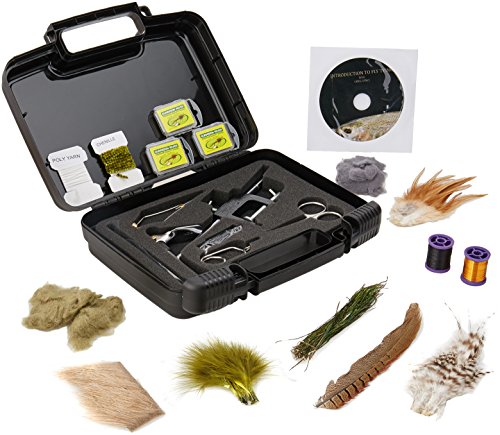
5. Scientific Anglers Deluxe Fly Tying Kit
PROS
CONS
Review
This kit comes in a handy carry case and contains everything you need to make dry and wet flies, streamers, and nymphs.
The kit includes an instructional DVD, a starter vice, fixed angle head and C-clamp base, a bodkin, hackle pliers, scissors, dubbing, wire, tinsel, hackle feathers, marabou, and a threader.
Bottom Line
This is a great beginner’s kit for basic use. It is a little smaller than expected, so you may need to clamp it to a slightly slimmer surface than a standard table. Despite this, it comes with most basic tools, aside from the half-hitch tool, which is completely necessary. The DVD is very educational and the carry case makes this easy to transport.
Product Specs
Dimensions:
3 x 8 x 14"
Weight:
1.8 lbs
Box Material:
Synthetic
Includes:
Heavy-duty vise, Thread bobbin, Bobbin threader
Hackle pliers, Scissors, Hair Stacker, Dry Fly, sizes 8, 12 and 14 Dubbing (2 Colors), Chenille (1 color), Marabou (1 color), Hackle (2 colors)
Elk Hair (Natural color), Peacock Herl (Natural color), Pheasant Tail (Natural color), Poly Yarn (1 color), Thread (1 color), Copper Wire (Fine)
How to Use a Fly Tying Kit
The video below shows you how to get started with your new fly tying kit. Follow the steps in the video or take a look at our summary points below. Here are a few tips on how to get going with your kit.
- Clamp It - Start by clamping your hook in a vice to keep it stable and sturdy.
- Attach Thread to the Bobbin - Next you will need your bobbin and to add the thread to your bobbin. Usually, this clips into place easily.
- Suck the Thread - Threading the bobbin can seem a little difficult as you have to get the fine thread through the long tube in the bobbin. An old angler’s trick is to place the tail of the thread just inside the tube. Suck the other side of the tube quite hard a few times, and the thread will come through the bobbin. Some people use a threader tool to thread the bobbin, by looping the thread through the threader and pushing the threader through the tube.
- Loop the Hook Backward - When you loop the thread over the hook, you want to work backward down the hook, away from the sharply curved end. Keep the tail at the hook end and turn the thread four or five times backward and then back over itself, so it locks off the thread and tail. The bobbin will hang and dangle, keeping the thread in line.
- Spin Down the Hook Shaft - When you spin the thread down the hook shaft toward the hook, you want to make sure you have a long tail that you can overlap all the way down. This keeps it easily distributed and firmly secure.
- Create a Loop - Pull out some thread and double this over to create a loop at the hook end of the shaft. You want this to be a big loop, secured by winding the thread back over itself again. Use these loops to secure the dubbing and add any anchors or weights. You can do this by weaving it through the thread and then tying it on. The video below shows the specific ways in which you can do this.
This video will also demonstrate how to use all the tools involved in this process.
Conclusion
Tying your own flies for fly fishing enables you to save a little bit of money in the long run. Although it is not a great deal of money at the outset, when you make your own flies, you’ll find they are of higher quality and get lost less frequently.
You’ll also enjoy tailoring the colors to your own preferences and creating a little friendly sportsmanship. You may also find that you can use less polluting materials when making your own flies, which helps to protect our waterways. Always remember to consider where you’ll be storing your tools.
If they’re going to stay on your boat, you may want to think about storing them in an airtight case to prevent corrosion, whereas if storing them in a messy workshop, you may want to ensure you have a designated station to keep all the tools organized!
Share to Pinterest


